Makes one large sheet of pastry
The difference between a full puff pastry and a rough puff is in the shaping and then ultimately in the amount of lamination (layers of pastry) after baking. A rough puff is easier to shape and far less intimidating but will yield fewer layers, not that you will really notice too much of a difference. Making a rough puff pastry at home is just worth it. I know it’s time-consuming, and all the folding seems a bit like origami making. But the result, when baked correctly is divine, crisp, flakey, shattering, rich, and buttery pastry, that makes anything that it is paired with taste better.
- 250g (2 cups) strong (bread) white flour
- 1 teaspoon kosher salt
- 250g (1 cup + 1 ½ tablespoons) butter, cold, cut into small cubes
- 120-150ml (½-⅓ cup) ice-cold water
- a) In the bowl of a food processor fitted with the blade attachment, place the flour and salt, add the cubed butter and pulse a few times until butter is the size of green peas. Add 60ml (¼ cup) water and pulse a few more times, add another 60ml (¼ cup) water and pulse again, the dough should look like it’s starting to clump. Test by opening the processor and squeezing a small amount of dough in your hand, if it holds together its ready if it’s dry and falls apart add water one tablespoon at a time, pulsing a few times between each addition. Test the dough between each addition until the dough holds together.
b) Alternatively, if not using a food processor: Sift the flour and salt into a large bowl. Add the butter to the flour and rub them into the flour until you have pea-sized bits of butter. If the butter starts to warm up, place the bowl in the fridge for 10 minutes before continuing. Make a well in the bowl and pour in about two-thirds of 150ml cold water, mixing until you have a firm rough dough adding extra water if needed.
- With either method, shape the dough into a flattish 13cm (5inch) square. Cover with cling film (plastic wrap) and leave to rest for 20 mins in the fridge.
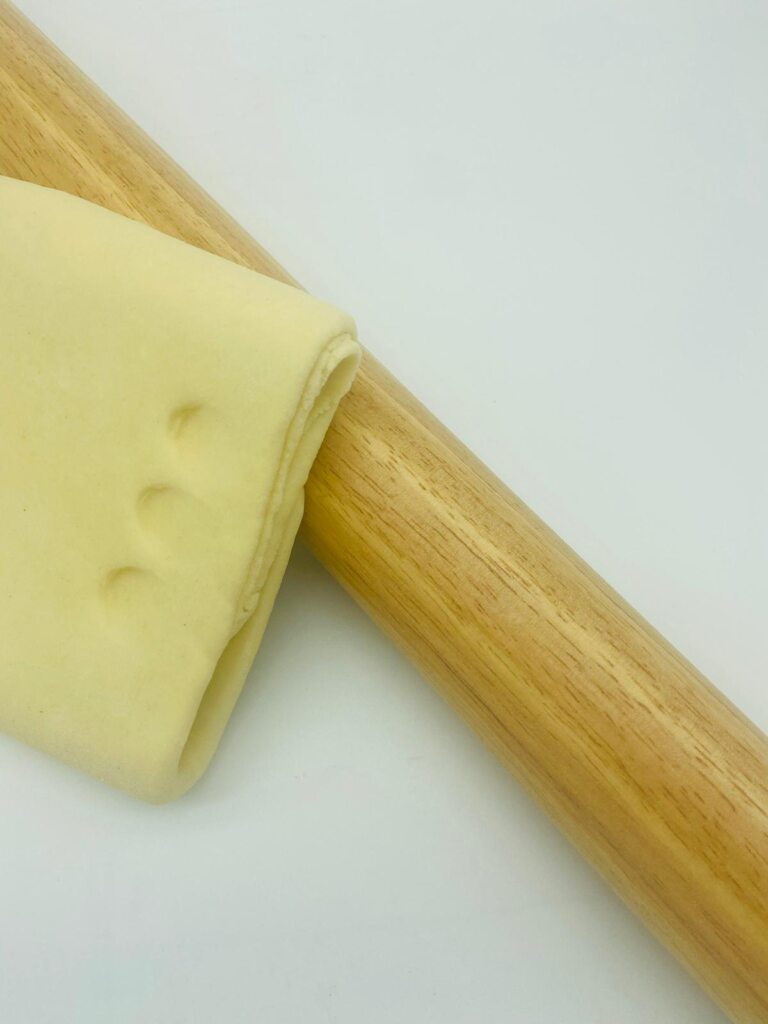
- On a lightly floured surface, using a lightly floured rolling pin. Roll the dough in one direction only, until 3 times the width, about 20 x 50cm (8x20inches). Keep edges straight and even. Fold the top third down to the center, then the bottom third up and over that. Give the dough a quarter-turn (to the left or right) and roll out again to three times the length. Fold as before, indent the top of the dough with your thumb so you know you have rolled and folded the dough one time. Cover with cling (plastic wrap) film and chill for at least 20 mins before rolling again.
- Repeat the rolling and folding process another two times. For a total of six folds. Placing a thumbprint each time on the dough so you don’t lose track of how far along you are. After the last fold. Rest the dough in the fridge for a further 20 minutes and then you are ready to use it.
- The dough will keep in the fridge for 4 days and in the freezer for 2 months.
Rough Puff at a glance:
-
- Make the dough,
- Shape into square
- Refrigerate 20 minutes
-
- Roll out and fold in three
- Quarter turn
- Roll out fold in three
- Mark with a thumbprint
- Refrigerate 20 minutes
-
- Roll out and fold in three
- Quarter turn
- Roll out fold in three
- Mark with a thumbprint
- 20 minutes
-
- Roll out and fold in three
- Quarter turn
- Roll out fold in three
- Mark with a thumbprint
- 20 minutes
- Ready
- to roll out thin and use
- To refrigerate
- To freeze